Sunday, May 30, 2010

May 24, 2010 - Beverly Hills Adult School Copperplate Class #8

ANNOUNCEMENT:  There will be no class next Monday 5/31/10 because of the Memorial Day holiday. The final class will be on Monday, June 7, 2010. We’ll be having a potluck.

Today DeAnn went over the elements of flourishing. She sat with students individually to go over their projects in progress. She also demonstrated gilding with loose gold and patent.

Trini's project in progress:

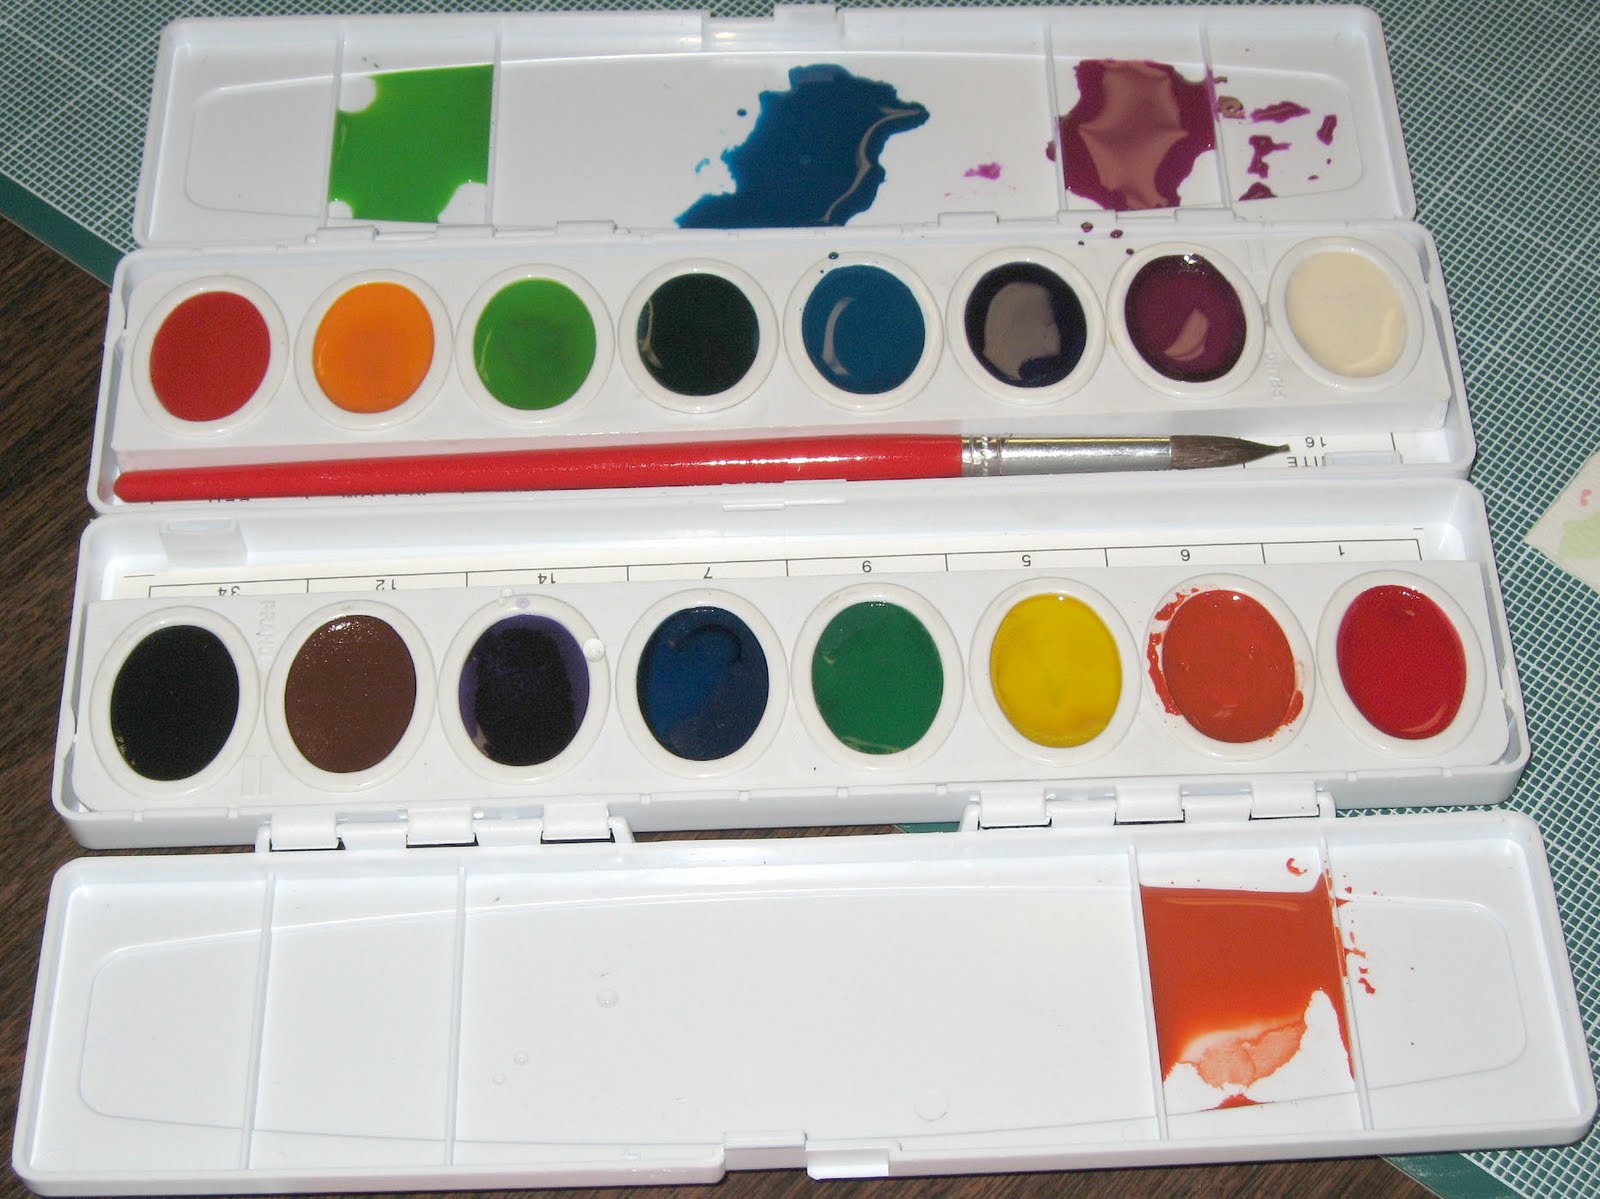
Loose gold can be difficult to work with because the sheet of gold is fragile and will easily tear or stick to something else. So for our class project, DeAnn recommends using patent gold, which comes on a paper backing, allowing for better control and trimming. Loose gold is used for raised or textured gilding because it can fold around raised edges and into crevices, where patent gold wouldn’t. However, the class project is flat gilding, so patent gold will be easier to work with. See previous blog entries for detailed gilding instructions.

TIP:  when brushing away the excess gold, don’t undermine the gold; brush in the direction it’s gilded, not against it.

Project idea:  Stained Glass Effect. Last week, DeAnn suggested this idea for your decorative capital. Here’s an example. For the final version, you should gild the letter first.

Elements of Flourishing:  See the Elements of Flourish handout for complete details. Think of flourishing as the decoration on a picket fence. If the base is sturdy and even, i.e. a picket fence, then your flourishing will look elegant. But if the picket fence is rickety, i.e. your copperplate is uneven and not parallel, then flourishing will look cluttered.

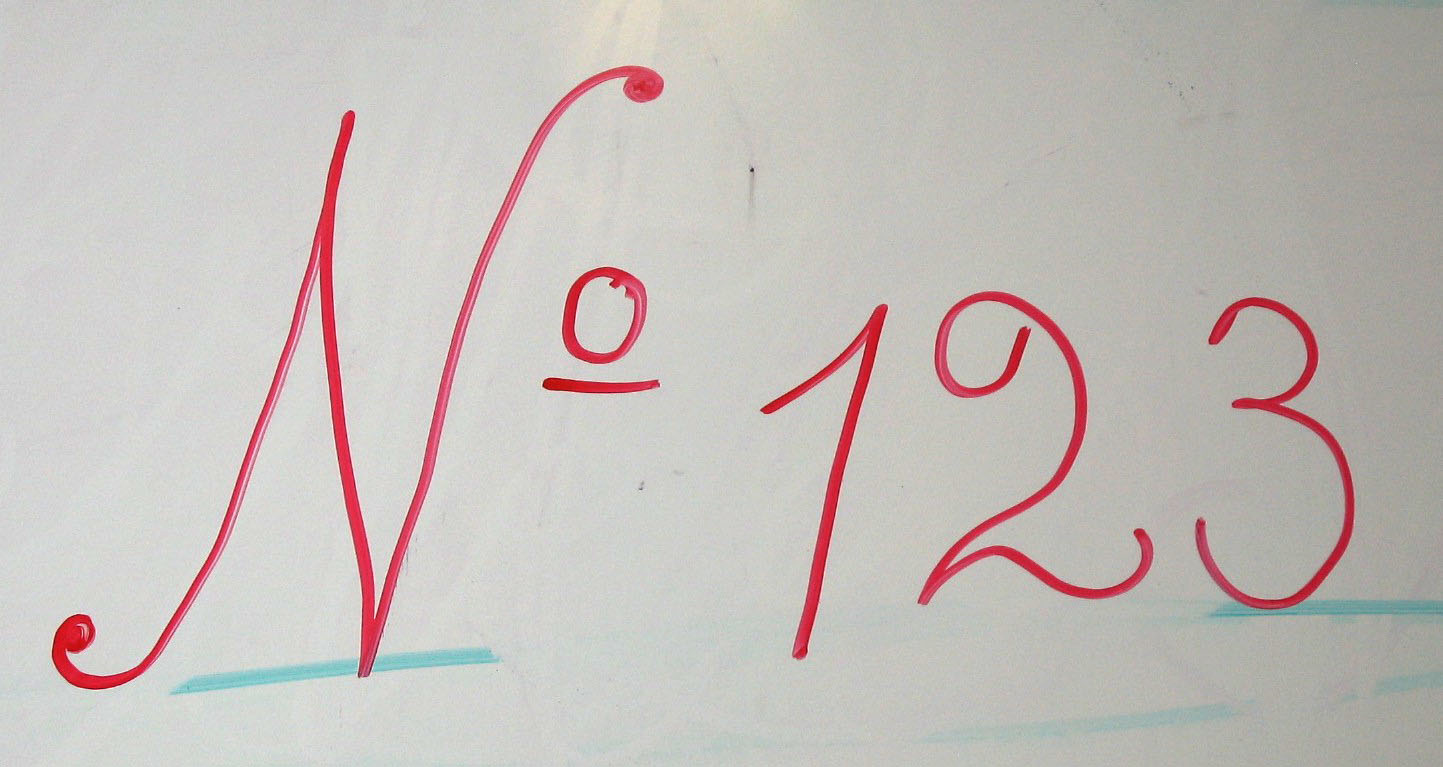
The basic 3 Elements of Flourishing are Oval, Figure 8, and Circle. Using your whole arm, draw an oval in the air. Are you moving your arm clockwise or counterclockwise? Is the oval wide or long? Practice these elements until your hand and muscle memory are very comfortable doing them in every direction, axis and width. Practice them in a vertical, horizontal and diagonal axis. Whenever you have a chance (talking on the phone, waiting for an appointment, etc.) try doodling flourishes. Remember: Flourishes should be BIG.

Combining the Elements:  a flourish can consist of only one element repeated, but by combining the different elements, especially with contrasting axes, you can create more interesting flourishes. For example, 2 concentric ovals or circles (spiral) is not as interesting as 2 ovals with contrasting axes.

Direction Change:  you can make flourishes more interesting by adding a direction change. The types are full stop, small loop, and turnaround. With direction changes, you can combine elements in new and different ways. Overlapping elements are more interesting.

Example of h with full stop direction change and g with a small loop.

Practice Independent Flourishes:  Fold up a sheet of cotton comp paper into 8 boxes. Working in pencil, do a flourish in each box. If may help to try drawing it in the air first. But don’t think about it too much, just do it. Let them "flow" out of your own creativity. Make a check-mark to the ones you like. Once you come up with 5 good flourishes, re-do them with a marker, like a Sharpie marker. Then do the same flourish with your copperplate pen. You may need to turn the paper to do some portions of your flourish. Notice how the thicks and thins change the look of your flourish.

No Dark Spots:  You want to avoid dark spots in your work. Don't make a Thick over a Thick. If you are going down and you are about to cross over a thick, then let up the pressure and keep it thin. A thick over thick creates a dark spot. Too many lines, too close together create a dark spot. So stand a little distance away from the work and squint your eyes at it to see if it has a nice texture and rhythm to it. This will help you see any dark spots.

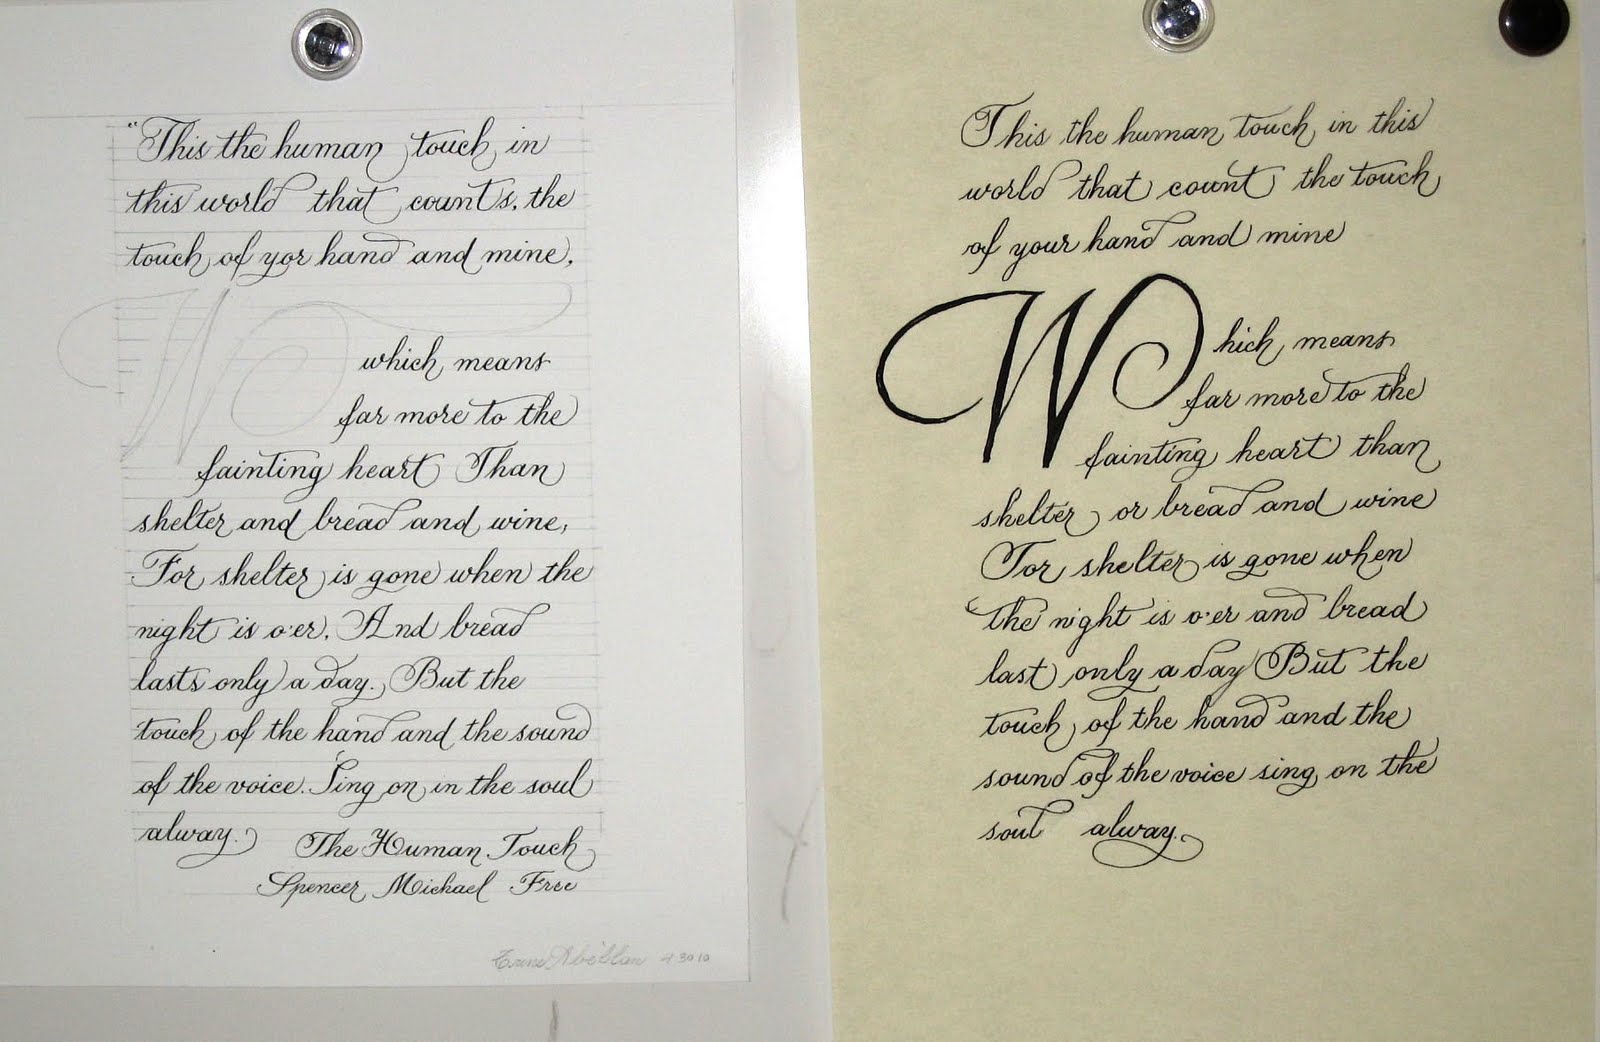
Flourishing your text:  think about flourishing out into the margins on your project. Think of the text as a block – you can add flourishes to the beginning and ending letters that flow into the white space of the margin. However, be careful of making similar flourishes on top of each other; you want some contrast, not a repetition of the shape. When you’re adding flourishes within the text, try to change them constantly instead of always making the same flourish on the same letters. Be mindful of descenders. If you make the descender flourish too large, it may hinder the ascender of the word below it. This is why writing out your text is important in planning where and how to flourish your text. If you’re flourishing an ascender, then the line above is already written, so you can avoid clashing flourishes.

This is a good time to use your 2 : 1 : 2 ratio guideline. This means that the space to the ascender and descender is double the x-height, leaving a lot of space for flourishing.

TIP:  If you’re having a difficult time with flourishes, try tracing some to get an idea of how they flow. DeAnn’s goal is to teach you to how to come up with your own flourishes. By freely experimenting with the basic elements and direction changes, you’ll become knowledgeable about what works for you.

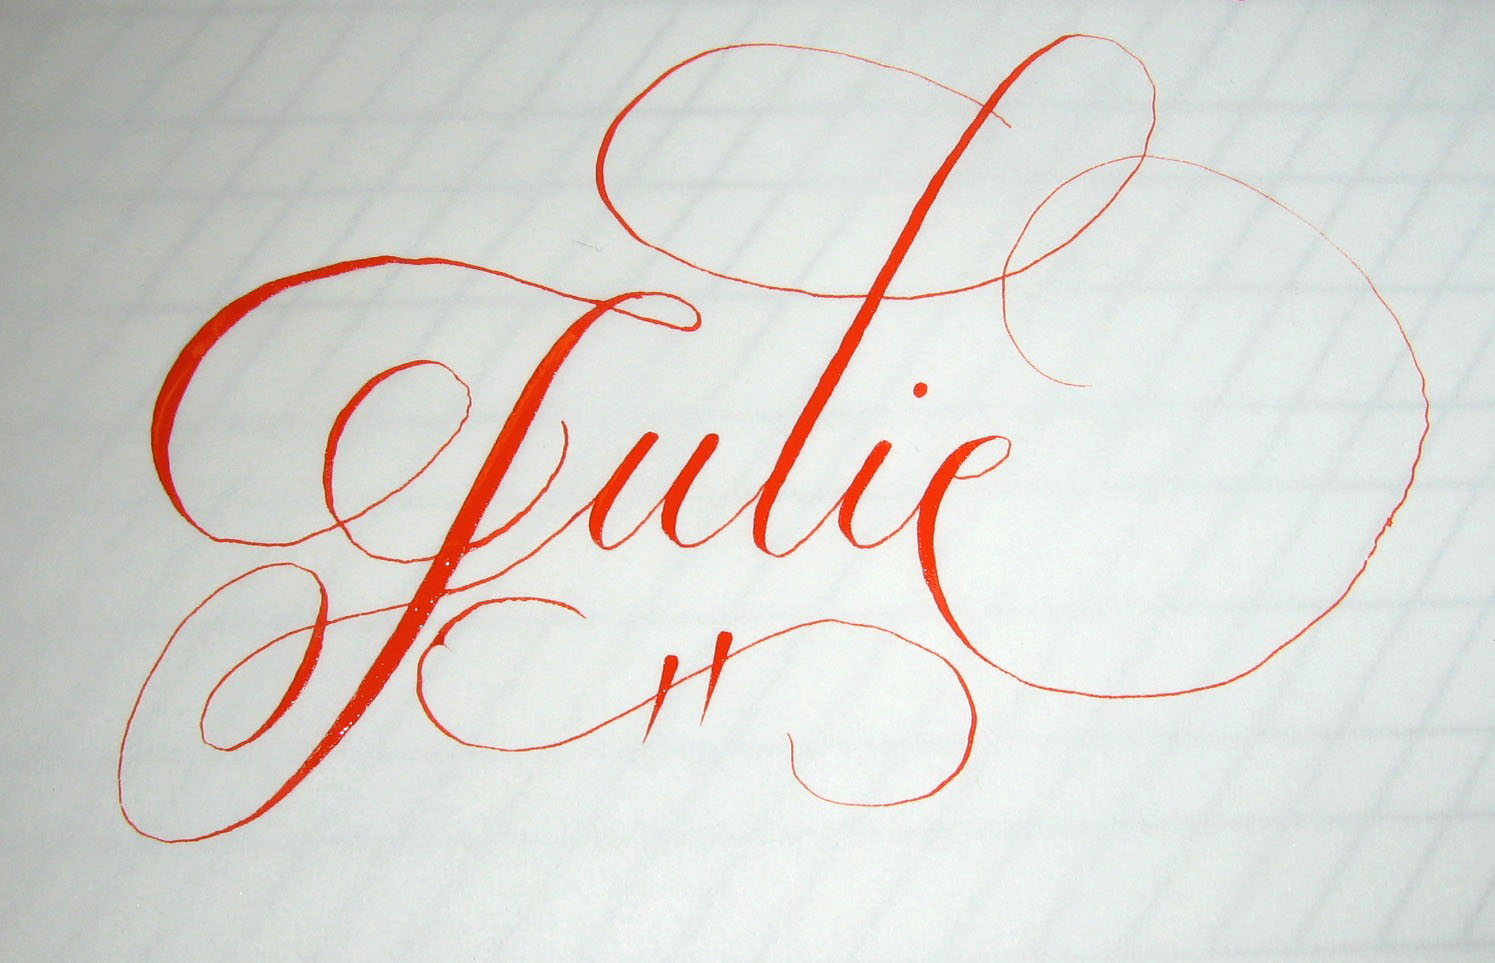
Flourishing your name:  Try writing out your name and keep the letters very simple, not finishing the ascenders and descenders and leaving them a "stub". Then come back and create flourishing with a pencil around and through out. Then go over that with your copperplate pen.


HOMEWORK:  Practice writing text for your project. Even if you feel that your works looks bad, write out your text on pergamenata paper. Practice flourishing (see exercise above). DeAnn’s goal is to make you feel comfortable with flourishing.

westchester books done by Sabina Bronner this semester

In Westchester the advanced class produced books using roman capitals. This is a sample of the books that Sabina Bronner made during the 8 weeks session. When I have the opportunity I'll post more pictures. But, Sabina certainly out did herself this semester. I'm very proud of her!!

Friday, May 21, 2010

May 17, 2010 - Beverly Hills Adult School Copperplate Class #7

Today DeAnn demonstrated gilding with composition leaf and provided different metallic materials for us to experiment with She also had us write Copperplate with Pelikan 4001 red ink mixed with powder gum Arabic – it’s like “writing with rubies.”


Recipe for Pelikan 4001 ink:  combine Pelikan 4001 red ink with 1 heaping teaspoon of gum Arabic powder. Mix together in a larger bottle (like a small jam jar) and shake/mix every once in a while for several days until the gum Arabic is completely dissolved. Pelikan 4001 ink is really for fountain pens so it’s very thin. But mixed with gum Arabic powder, it becomes thick enough for Copperplate. Liquid gum Arabic doesn’t work in this case. Be aware that dry gum Arabic doesn’t always mix well with all inks so this recipe may not always result in Copperplate-writable ink.

Metallic effect with red "rubies" ink: Using the EF66 nib, write a large decorative capital with the Pelikan 4001 red ink on pergamenata. While the ink is still wet, shake some Schmincke gold powder onto it. Once it dries, you can brush off the excess.

Metallic Decoration:  DeAnn brought a variety of metallic and glitzy accessories for us to try. She demonstrated gilding with composition leaf. In the Middle Ages, illumination was done on real vellum (calf’s skin) with real gesso, but we won’t be going into that here. Last semester, the project was an illuminated manuscript page in the style of the Middle Ages/Renaissance using real gold leaf and gesso made from Sobo glue and water. Detailed instructions are here and here.

The types of metallics that DeAnn provided:  real gold leaf (from Easy Leaf), composition metal leaf, foils, Staedtler Hot Foil Pen, metallic powders from Schmincke and Jacquard, metallic rub on pastes, metallic colored pencils, and even rhinestones that were sticky-backed.

Demonstration of gilding with composition metal leaf:  The handout was a decorative “S” for us to trace onto the pergamenata piece of paper. DeAnn suggested using a different type of metallic on the leaves and letter. She “painted” a leaf with Sobo glue and let dry. Then she breathed on it to re-hydrate it, then applied the composition metal leaf. She pressed it firmly, then burnished it with a Grifhold burnisher using the spoon tip.

Flourishing Capitals: last week’s handout was a sampler of various styles of capitals. DeAnn’s goal is for us to be able to recognize the flourishes versus the basic shape of the capital letter.
The basic flourish shapes are Oval, Figure 8, and Circle. Remember: flourishes are BIG. Flourishes looke more interesting if they contrast in size and axis. Concentric circles/ovals aren’t that interesting. As long as the basic shape of the letter looks good and the scale of the flourish is appropriate (i.e. big), the capital will look good.


Pergamenata notes: because the pergamenata paper is so smooth, it’s difficult to create a contrast between the thicks and thins. The problem is achieving the hairline thins. So to create a better contrast, press harder on the downstrokes so that they’re thicker in comparison. The general consensus is that the best nibs for writing on pergamenata are the Gillot 303 and 1068.

Project ideas: for your decorative capital, one idea is to make the letter metallic. Then outline the “box” that contains the letter whose flourishes extend beyond the “box” and paint the various areas with different colors in watercolors for a stained glass effect.
Besides the decorative capital you can illuminate or color other capitals within the text. You can also include decorative elements along the border, like flowers and vines.

HOMEWORK: continue practicing your project text on the small guideline. If you’re ready, create the layout for your project using the project template on the cotton comp paper.

Wednesday, May 12, 2010

May 10, 2010 - Beverly Hills Adult School Copperplate Class #6

ANNOUNCEMENT:   Copperplate class returns to its normal schedule next week, 5/17/10. Class will start at 10:00 am again and end at 1:00 pm for the rest of the semester.


Today DeAnn provided different papers and liquids for us to experiment with.  She then demonstrated writing Copperplate on watercolor paper and painting dot flowers. The handouts were copies of Satomi’s friendship exercise and project sample and a packet of Copperplate examples.

DeAnn had us write on each type of paper with all the nibs using the different inks she brought. The papers were in different colors, textures, and weights.  Guidelines weren’t used because most of the papers are too thick to see through.


The goal of this exercise was to observe how the different nibs behaved on the different papers using the different inks. Label nib and ink on each writing sample and record observations. For example, shiny paper may need a sharp nib.

One of the sample papers is pergamenata, which will be used for the project. This paper is closest in appearance to vellum. It has a very smooth surface.

The following inks were used:
1. Vermillion to start with.
2. Black ink
3. Acrylic inks (FW Acrylic Artists Ink, Daler Rowney Pearlescent, Dr. Ph Martin Spectralite)
4. Watercolor (if you have it, Prang) and/or gouache

DeAnn provided little plastic containers as inkwells to hold the acrylic inks. Use masking tape folded over on itself to tape the inkwell to the table so it doesn’t tip over.

You could also easily create an inkwell holder from a sponge by cutting an “x”-shape into it. Dampen the sponge and push the inkwell in – when it dries, it’ll hold the shape of the inkwell.

Demonstration of writing Copperplate with watercolor and painting dot flowers: DeAnn used 90 lb. cold press watercolor paper, but you can use any weight watercolor paper. The best nib to use on cold press watercolor paper is the Hiro 41. The watercolors are Prang with 16 colors.

Use a pointed smaller size watercolor brush for the flowers and a stiff bristle brush (like the Royal soft grip #3) to load your pen nib. To set up your workspace for watercolor, have 2 containers of water – one is for dirty, one is for clean. When changing colors, you’ll be rinsing  your brush first in the “dirty” container, then in the “clean” water to ensure no color contamination. Change the water as needed when it gets too dirty.

1. For demonstration purposes DeAnn wrote free-hand, but you should line the paper for a real project that is important to you. Use the lids of the Prang watercolor set as your palette. Soften the pan with a couple drops of water, then put the colors you want to use in a clean palette space and add drops of water to thin the watercolor to an ink consistency. The Prang colors stay vibrant even with considerable thinning. If you use the watercolor pan itself as the palette, the ink will get thicker and thicker.

2. Use a small stiff bristle brush to load your pen nib.  Initially, brush color on top and bottom of nib. Then feed by just brushing the top of the nib. DeAnn likes the stiff brush because it cleans your nib even as it loads it with color. Hold the brush in your left hand with the tip pointed away so you can load your nib away from your paper and avoid splattering the paper.

3. Start with one color and add a 2nd color to the nib before the first one is completely gone so it blends. When switching colors on your brush, first rinse it in the “dirty” cup, then in the “clean” cup. Wipe off excess ink or water on rag. Be careful of colors on opposite sides of the color wheel (e.g. red & green), the blend may be brown/gray. This look can be organic though.

4. If the color changes too abruptly, go back and touch some of the second color into the still-wet strokes for a smoother transition. As long as it’s still wet, the color will continue to migrate out.

5. Continue adding new colors in this way, and/or go back to the original color.

Painting dot flowers:
1. Add a few drops of water to the watercolor pans you’ll be using to hydrate them. Create odd-numbered groupings of dots – these should be very concentrated color. Groups of 3 or 5 dots is optimal.

2. While these dots dry, you can write your message with watercolors (see above).

3. Once the dots are dry, first draw a triangular shape with just water at the base of a dot. Then slowly pull color into the wet area. Leave some white space (non-colored areas). Paint other flowers; when overlapping petals, leave a thin white border so the colors don’t mix together.

4. After you’ve painted the flowers, paint some leaves in with yellow-green. These should be subtle, so use lots of water to a little watercolor.

5. When the petals are dry, outline the petals with a pointy brush held upright. Don’t make the outline solid or heavy; leave white space especially if you didn’t leave much white space in the petals themselves.

6. As a finishing touch, put some orange or yellow dots at the center of the flowers and as accents around the flowers. Put a sharp point on your brush and hold it very straight to make the accent dots.

Preview of metallic effect for the project:  using Trini’s practice piece on pergamenata, DeAnn gilded the decorative capital with composite.

HOMEWORK:  Continue writing with all your nibs on the different papers with the various inks. Remember to label each writing sample. Record your observations so we can discuss them next week. Find some text for the project – it should be about 70 words and can be any text that you like (e.g. poem, song lyrics, quote, etc.). Practice writing text using the Small Guideline (x-height = 1/8 inch); this will be the size for the project. If you haven’t practiced yet on the Medium Guideline (x-height = 3/16 inch), then do that first, then go on to the Small guideline.

Friday, May 7, 2010

May 3, 2010 - Beverly Hills Adult School Copperplate Class #5

ANNOUNCEMENT:  Due to a scheduling conflict, Copperplate class will start at 9:30am next week, Monday 5/10. Copperplate class will be from 9:30 am to 12:30 pm.

Today DeAnn reviewed the friendship exercise and banner.  She then demonstrated Copperplate basic formal capitals.

Review of “friendship” exercise: Issues that students found difficult were spacing and making all the downstrokes the same thickness. Another issue was making all the strokes be the same; for example, making all the #6 strokes the same. DeAnn will be correcting these exercises in detail. She highly recommended that anyone who hadn’t done the friendship exercise find time to work on it. She feels that it helps you to take your Copperplate to the next level, as it really makes you learn how each stroke looks.

DeAnn’s tip:  the larger you’re writing Copperplate, the thicker the downstrokes have to be.

If you’re doing Copperplate for reproduction (e.g. for an invitation), the hairlines can’t be too thin or they’ll fall out when reproduced. Also, you’re usually writing at a larger size for reproduction, so if the hairlines are too thin, they’ll disappear when the piece is reduced.

Homework notes:  For letters like n or p, remember to start the #2 or #4 strokes from the baseline.

For the “o”, there should be no pressure on the right side of the center of the letter.

Project:  Satomi wrote out a sample on the pergamenata paper – it was 70 words. So the text you choose should be about that length. However, if it’s too long, just stop when you come to the end of the template. Don’t worry about finding text that will fit exactly. DeAnn is more concerned about how it looks. Choose text where you like the initial capital letter – this will be what’s decorated.


Question:  Is the entrance stroke always necessary? (for example, on an “a”)
DeAnn:  You should practice always having an entrance stroke. This is more formal. Once you become more proficient, you can decide whether or not to include the entrance stroke based on the context and the letter that comes before it.

DeAnn took a poll of students’ favorite nibs:
Gillot 1068 – 5
Brause Steno – 2
Hiro 40 – 2
Brause EF66 – 2

Copperplate Capitals:  the size is from the base to the ascender. For demonstrating them on the board, DeAnn didn’t write in the waist guideline. See the handout.
When writing the capitals, think OVAL for the strokes. Many of the letters can be visualized as a combination of ovals.
Primary Stem Stroke: This is the thickest of all strokes and starts at the ascender and goes down to the base. No pressure – Pressure – No pressure – Terminal Dot. This stroke should be slightly thicker than the other lowercase downstrokes. The terminal dot is there to stop your eye from continuing to move.
Secondary Stroke: should be the same or less than the thickness of the Primary Stem Stroke. This stroke should curve into the letter so that the eye doesn’t travel away from it.

Remember: Flourishes should be BIG!

Notes on individual letters:
A:  starts at the bottom at the baseline with a terminal dot.
B:  the flourish should be big, it should come down to about halfway to the base.
C:  think of it as 3 intersecting ovals.
D:  unlike the cursive “D” that many of us learned in grade school, if you think of the Copperplate “D” as one big oval, the body of it is a small portion and most of it is the flourish.
E:  like the “C”, think of it as intersection ovals. Swing the lower half out enough to have enough space for the final loop.
F:  start like the "T"; the cross-bar ends in a small loop
G:  unless you know this is the “G”, it may look incomprehensible. Think of the General Mills “G”.
H:  start with a #4 stroke that ends in a diagonal upstroke. It shouldn’t curve too much where the primary stem stroke starts.
Alternate H with a carrot:

I:  Think of the secondary stroke as an oval shape.
J:  Primary stem stroke goes down to the descender
K:  the secondary stroke should be parallel to the Primary Stem stroke
L:  curve last stroke back into itself, not off into space. You want your eye to be brought back into the letter.
M:  starts at the bottom at the baseline with a terminal dot. Try to keep it pretty skinny.
N:  start at the bottom at the baseline with a terminal dot. Think of the downstroke as an s-shape. The final upstroke ends in a terminal dot above the ascender line and should be parallel to the initial upstroke.
O:  Think of the letter as a big oval with a curvy flourish to end it
P:  make the flourish big
Q:  think of this as an oval plus a figure-8
R:  the secondary stroke should be parallel to the Primary Stem Stroke
S:  similar to the “L” but ends with a terminal dot
T:  if the cross bar of the “T” seems too thin, go over it with a little more pressure
U: the initial stroke curves back slightly, it doesn’t go straight down. Start the curve early so that you have a nice big triangle
V:  like the “H”, start with a flourish similar to the #4 stroke but ending on a diagonal stroke; then downstroke. Upstroke ends with a terminal dot above the ascender line. Focus your eyes on the location where the terminal dot should go and your hand should follow. “Look where you’re going.”
W: start with a #4 stroke that ends in a diagonal upstroke. Like the “V”, but don’t put too much white space between the “V”-spaces; letter should be pretty narrow.
X:  First stroke ends in a terminal dot. Second stroke should overlap at the center, not be double-wide through the center. If you find that difficult, then don’t pressurize the second side.
Y:  doesn’t go down to the descender, but only to the base. Ends in a terminal dot.

Z:  this is DeAnn’s modern version of a “Z”. The last touch is a “carrot” flourish: set – press – pull and release.

Alternate "Z"s:
Historically correct "Z" that DeAnn finds ugly, so she prefers not to use it:

Observe where those ovals sit in relation to the letter. Practice drawing ovals in the air with your whole arm to get a feel for them. The capital letters should not have small flourishes.

Addressing Envelopes using the Ampersand symbol: all these symbols for “and” are variations of the Latin “et” which means “and”.
These ampersand symbols are slightly taller than the waist-line:

Numbers:  all sit on the base line and are slightly taller than the waist. By the time Copperplate was developed, we were writing Arabic numbers with Latin letters, so they didn’t really go together very well. Numbers could be “made up” to go with various calligraphic hands.


A graceful way of putting “#” on an address:  use “No”


Old-fashioned way of writing numbers, where some dropped below the baseline:

Some Capitals are connectable, meaning they can end in the entrance stroke to the next letter, but others aren’t.
Connectable Capitals: A, F (both), H, I (both), J, K, M, R, U, X, Z
Not-connectable: B, C, D, E, F (depends on next letter), G, I (depends on next letter), L (historically connectable, but DeAnn recommends not to connect), N, O, P, Q, S, T, V, W, Y

HOMEWORK:  Practice writing Capitalized words. Never write Copperplate words all in capitals! See DeAnn’s website for alphabetical Flower Names.